Overview
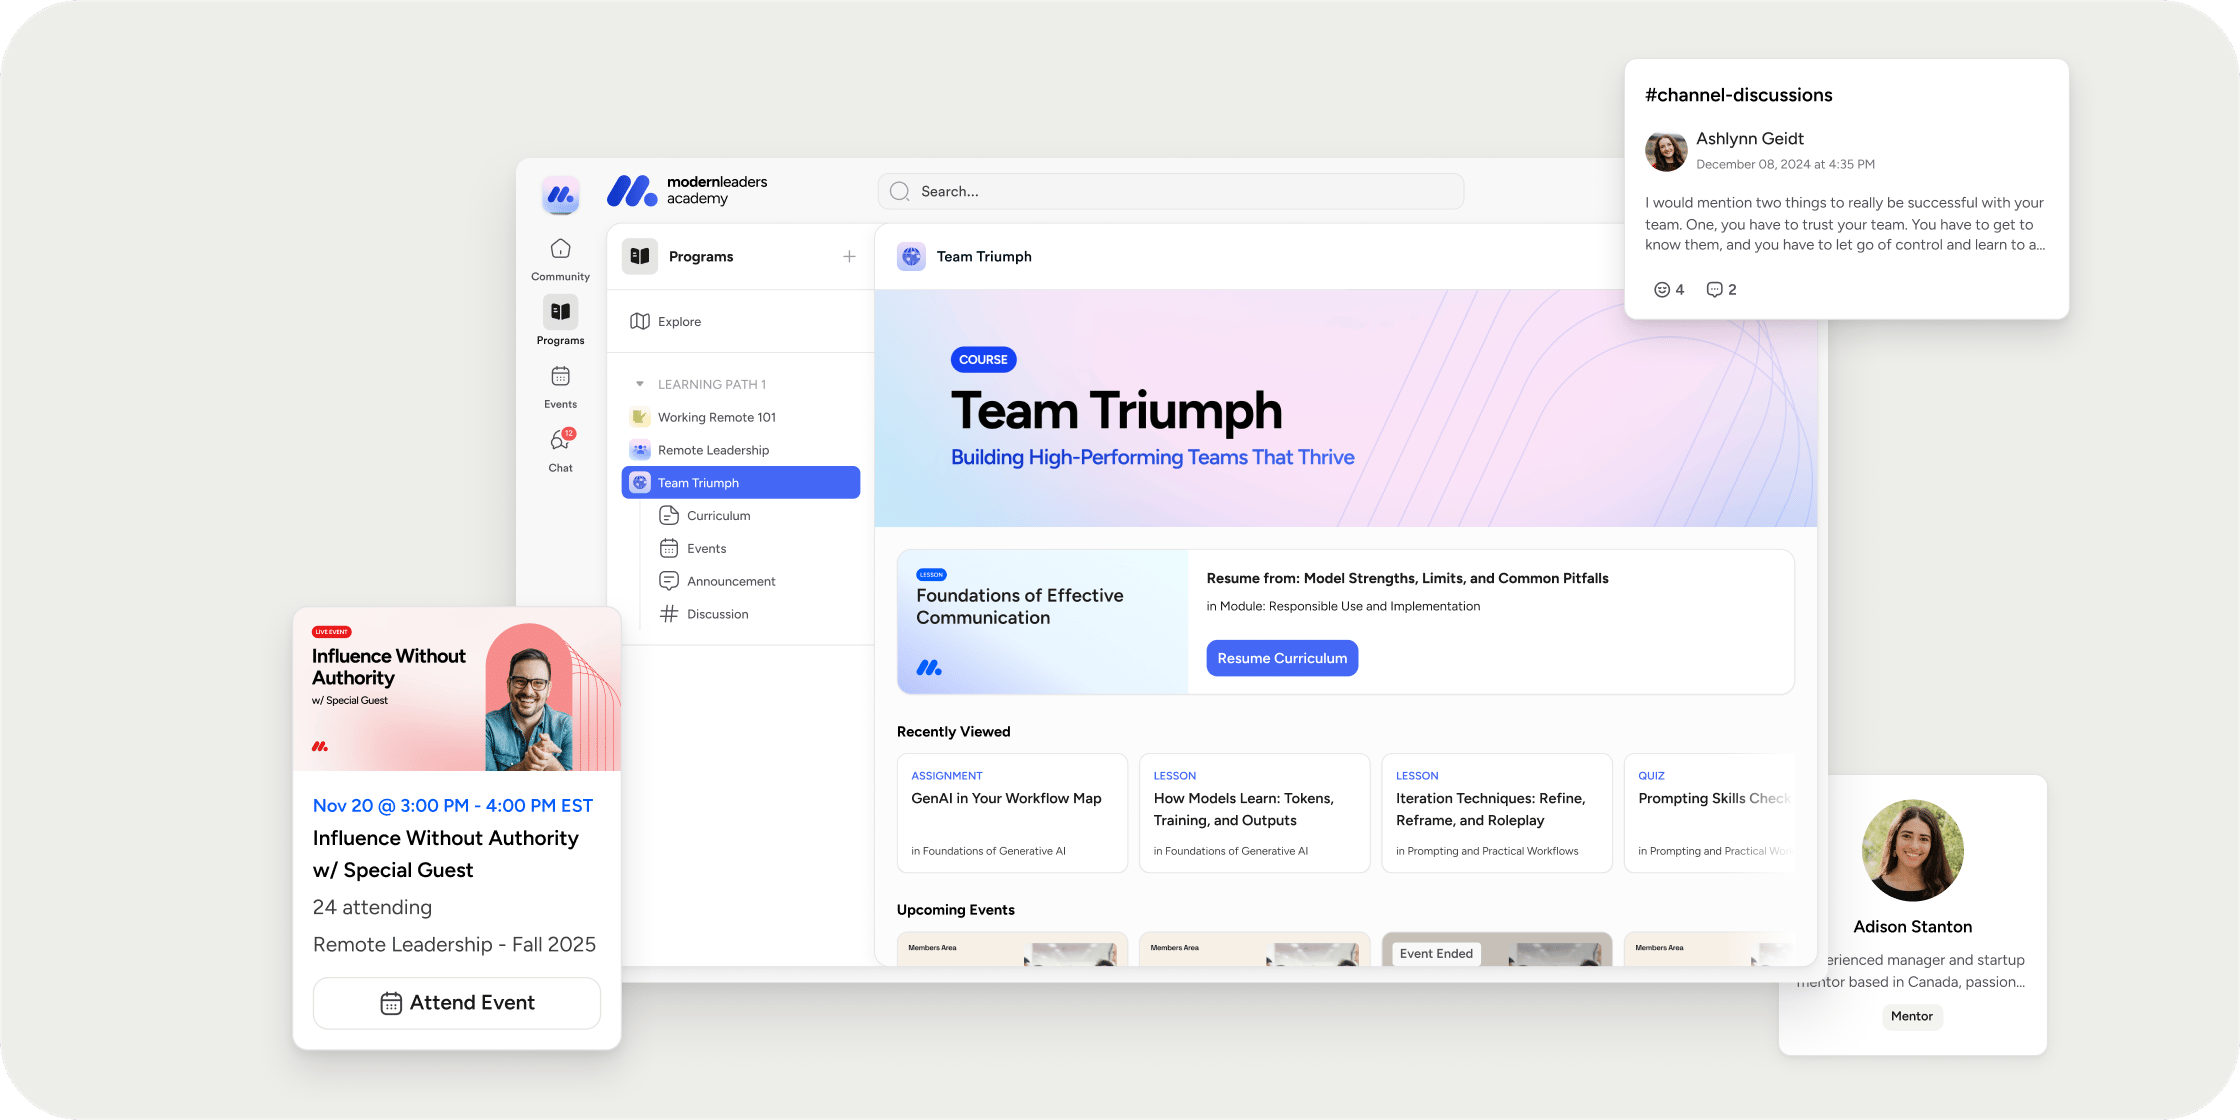
Every Program you create in Disco comes with a flexible dashboard, a left navigation, and a set of notification controls. You can add apps for curriculum, events, resources, and discussion channels, arrange content blocks on the dashboard, apply your brand colors to the cover and banner images, and decide which emails get sent to Members. The options below cover the most common customization tasks for Admins and Instructors running a Program.Open a Program to Customize It
- Go to Admin Area → Products, or open the Learn section from your Academy sidebar.
- Select the Program you want to customize.
Add and Reorganize Apps
Apps are the building blocks of your Program. Each app gives Members a dedicated space for a type of content, such as curriculum, events, resources, or discussion channels.- Open the Program and locate the left navigation.
- Select Add App and choose the app type you want to include.
- Drag any app up or down in the list to reorder it.
- Select an app to rename it or update its settings.
Design the Program Dashboard
The Program dashboard is the first page Members land on when they open the Program. You control what appears there by editing the cover image and adding content blocks.- Open the Program and go to the dashboard view.
- Select Edit Dashboard to enter editing mode.
- Add blocks for the apps you want to surface, such as a hero banner, events, curriculum, posts, and discussions.
- Drag blocks to reorder them on the page.
- Select Save to publish your changes.
Create Images for Your Program
You can generate on-brand cover images and banner images using your Academy’s brand colors and theme. Your brand color comes from Admin Area → Appearance → Theme → Primary Color. If you have not set a brand color yet, Disco applies a default theme color automatically.Program Cover Image
- Open the Program and go to Product Settings.
- Under General Details, select the cover image to edit it.
- In the media picker, select Create an image using your brand asset, or open the Template tab.
- Select Create Image. Your brand colors and Program title are applied automatically.
- Preview the image and select Use Image.
- Select Save as Draft or Publish Changes.
Program Dashboard Banner Image
- In the Program Banner block on the dashboard, select the three-dot menu in the top right.
- Select Edit Block.
- In the modal, select Create Image Using Template.
- Preview the image and select Use Image.
- Select Save.
Configure Notifications
Notifications keep Members in the loop on activity inside a Program. You control which emails get sent and which address Members reply to.- Open the Program.
- Select the three-dot overflow menu on the Program.
- Go to Settings → Notifications.
- Toggle each notification on or off, and update the reply-to email as needed.
- Select Save.
- New Comments & Replies. Triggered when a new comment or reply is made on posts, assignments, lessons, and similar content.
- Welcome Message. Triggered when someone registers for your Program.
- Early Access Started. Triggered when early access begins.
- Assignment Due Date Reminder. Triggered 24 hours before the due date.
- Reply-to Email. The email that replies from Members are sent to.
FAQ
How do I get to the notification settings for a Program?
How do I get to the notification settings for a Program?
Open the Program, select the three-dot overflow menu, and go to Settings → Notifications.
Can two Admins both receive notifications for a Program?
Can two Admins both receive notifications for a Program?
By default, only the person listed as the Instructor on the Program receives Program notifications in Disco and connected channels like Slack. To give a second Admin visibility, add them as an Instructor on the Program so they can manage their own notification settings for it.
Can I change the reply-to email for Program notifications?
Can I change the reply-to email for Program notifications?
Yes. Open the Program, go to Settings → Notifications, and update the Reply-to Email field. Replies to Program notification emails are routed to that address.
Where do replies go for notifications sent from outside a Program?
Where do replies go for notifications sent from outside a Program?
Replies to Program notifications go to the reply-to email you configure in the Program. Replies to other notifications that do not have a configurable reply-to go to a system address that is not monitored. If this matters for your use case, talk to your Disco contact about the Custom Notification Email Domain feature on the Enterprise plan.
What happens if I have not set a brand color yet?
What happens if I have not set a brand color yet?
Disco applies a default theme color so your generated cover and banner images still look polished. Set your brand color in Admin Area → Appearance → Theme → Primary Color when you are ready to fully customize.
Can I reorder apps in the left navigation?
Can I reorder apps in the left navigation?
Can I upload my own image instead of using the template?
Can I upload my own image instead of using the template?
Yes. In the media picker for the cover image or the Program Banner block, upload your image directly rather than selecting the template option.
Where do I find the cover image after I upload it?
Where do I find the cover image after I upload it?
The cover image appears at the top of the Program and on Program cards elsewhere in your Academy. If you uploaded a cover image and do not see it, make sure you selected Publish Changes in Product Settings.
Why did my Welcome Message not send?
Why did my Welcome Message not send?
Confirm the notification is toggled on under Settings → Notifications, and make sure the test account you used is actually registered for the Program. If you are testing with the same email that is registered as an Academy Owner or Admin, Disco treats you as the sender rather than a new registrant.
Can Admins track whether Program notification emails were delivered, opened, or bounced?
Can Admins track whether Program notification emails were delivered, opened, or bounced?
No, Disco does not provide tracking of email notifications.
Is there a notification for when a new curriculum module is released to Members?
Is there a notification for when a new curriculum module is released to Members?
Yes, there is an email notification that gets delivered when a new module becomes available. It is not one that can be turned off or customized.