Overview
Brand Customization lives in the Appearance section of your admin area. It covers your Academy’s badge, logo, favicon, cover image, color theme, custom domain, role labels, and sidebar navigation. These settings give your Academy a cohesive, professional look that reflects your organization’s identity.Set Your Academy Badge
Your Academy badge appears in the top left of the academy switcher and serves as the primary visual identifier for your Academy.- Navigate to Admin → Appearance.
- Click Community Badge.
- Click Edit.
- Choose one of the following options:
- Icon: select from a library of icons
- Emoji: pick an emoji
- Color with initials: display your Academy’s initials on a colored background
- Upload: use your own image file
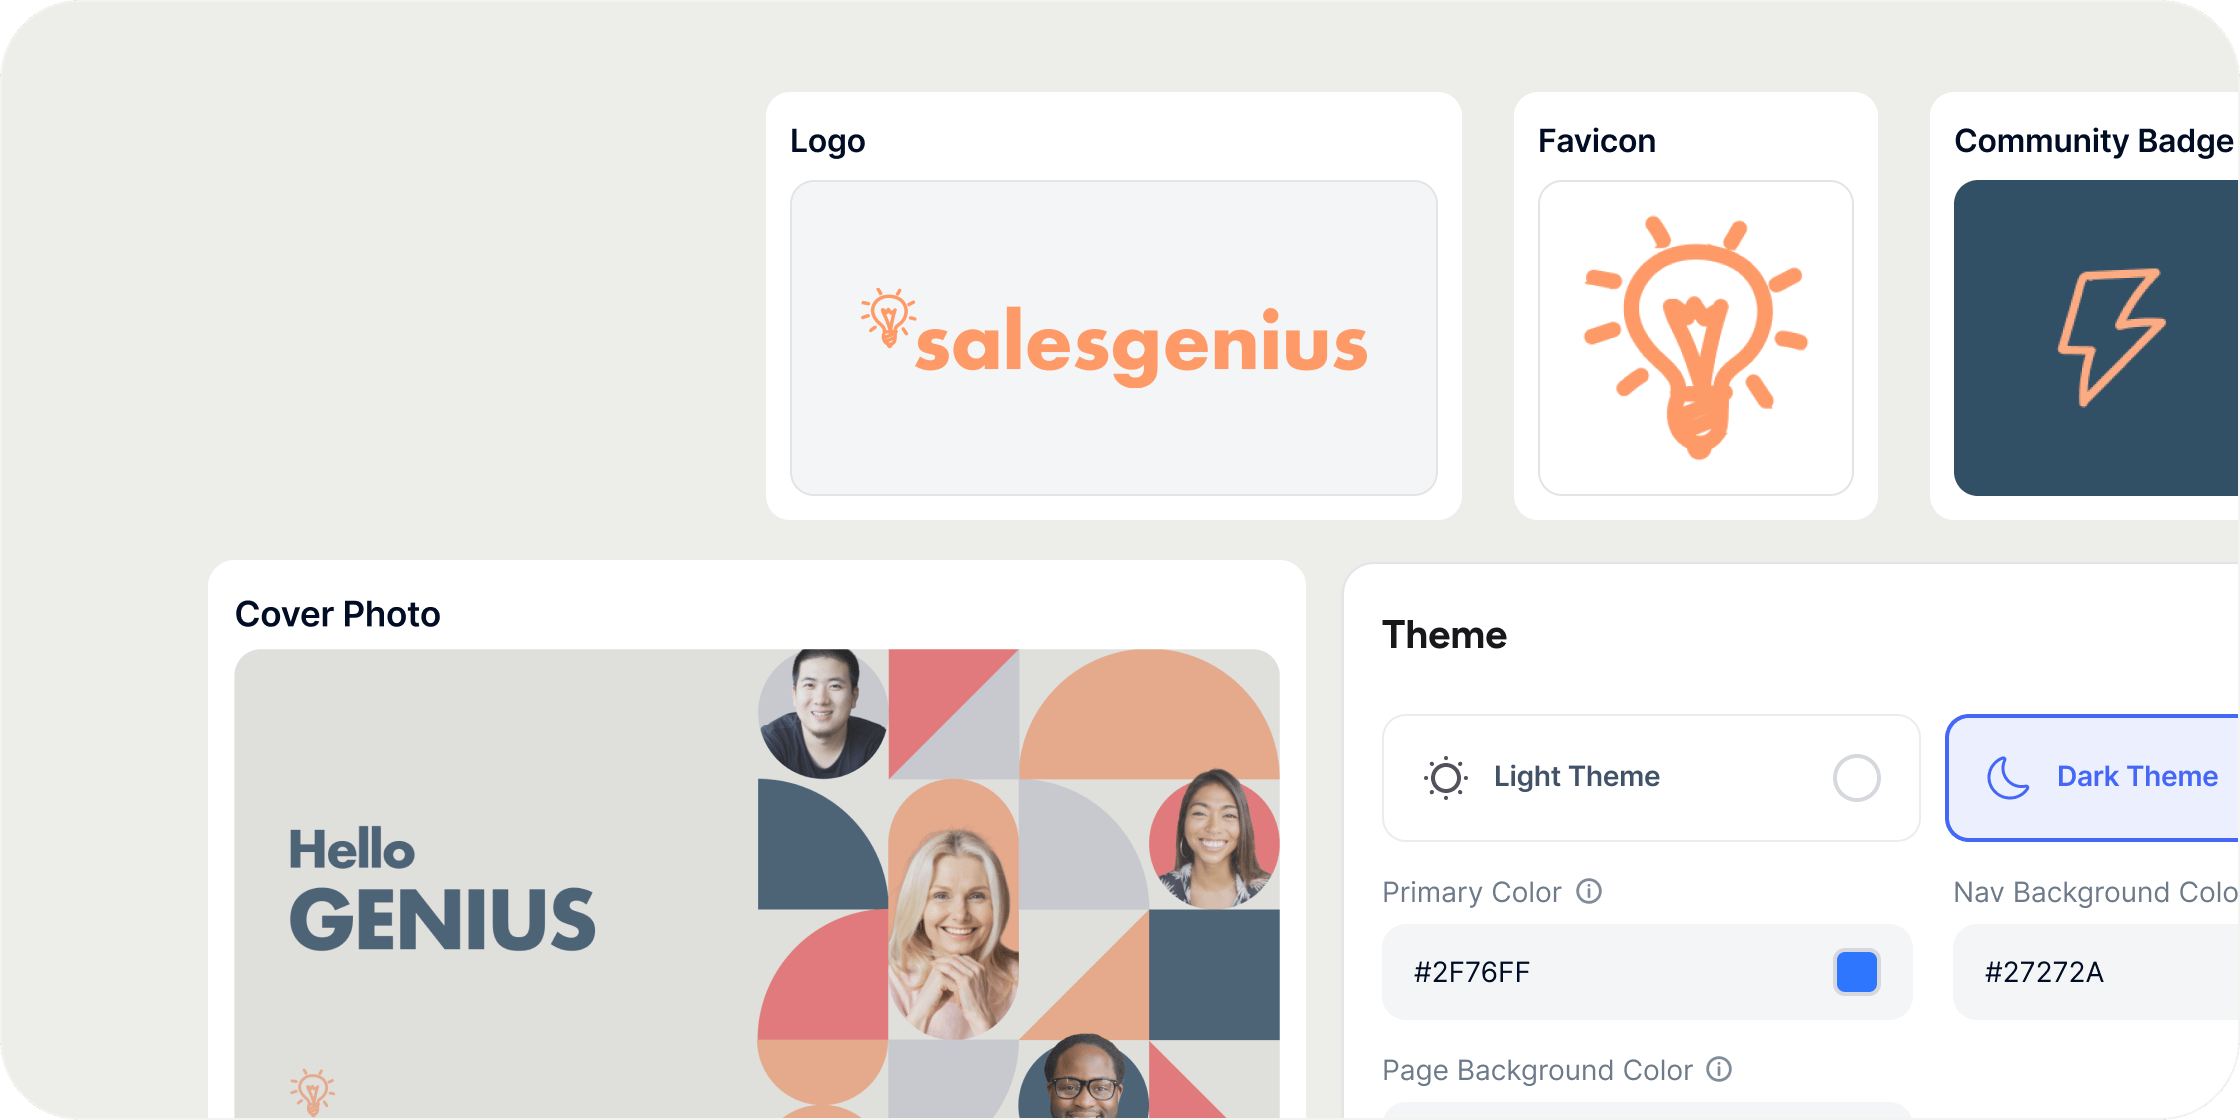
Upload Your Logo
Your logo appears across your Academy and adapts to light and dark themes. Upload separate versions for each background to ensure your logo always looks its best.- Navigate to Admin → Appearance.
- Click Logo.
- Upload a logo for light backgrounds and a separate logo for dark backgrounds.
- For each version, choose from your Assets, upload a file, browse Unsplash, or generate one using AI.
Set Your Favicon
Your favicon appears in browser tabs and bookmarks.- Navigate to Admin → Appearance.
- Click Favicon.
- Choose from your Assets, upload a file, browse Unsplash, or generate one using AI.
Upload a Cover Image
Your cover image appears on invitations, landing pages, and as the default image in link previews.- Navigate to Admin → Appearance.
- Click Cover Image.
- Choose from your Assets, upload a file, browse Unsplash, or generate one using AI.
Customize Your Theme and Colors
Your theme and color settings define the visual tone of your Academy. The default theme is light.- Navigate to Admin → Appearance.
- Under Theme, select Light or Dark.
- Set your Primary Color, Nav Background Color, and Page Background Color.
Connect a Custom Domain
By default, your Academy is accessible at yourname.disco.co. You can connect a custom domain to use your own URL instead.- Navigate to Admin → Appearance → Domain.
- Fill out the form with your custom domain details.
Customize Labels
Labels control the terminology used throughout your Academy for roles and content types. You can rename each label to match your organization’s language. Supported labels include: experienced member, experienced instructor, experienced manager, community member, admin owner, product, curriculum, and pathway.- Navigate to Admin → Appearance → Labels.
- Click any label to edit it.
- Enter your preferred term and save.
Configure the Sidebar
The sidebar is the primary navigation for your Academy. By default it includes tabs for home, learning, events, chat, and admin. You can adjust its layout and visibility to match your Academy’s structure.- Navigate to Admin → Appearance → Sidebar.
- Toggle off Text Labels to display icons only.
- To disable specific features, turn off any of the following:
- Chat (entirely), or disable only Channels or Direct Messages individually
- Learning tab (hides all Programs from navigation)
- Events tab (removes events from navigation)
- To rename navigation tabs, update the labels for Home, Learning, Events, and Chat.
Generate Branded Images
Branded image generation uses your Academy’s primary color and active theme to create on-brand cover images for Programs, events, and dashboard banner blocks.- Open a Program, event, or dashboard banner block and navigate to its cover image setting.
- Click into the media modal.
- Select the Template tab.
- Click Generate to create a branded image using your current theme and primary color.
FAQ
Do I need to upload both a light and dark logo?
Do I need to upload both a light and dark logo?
No. You can upload one or both versions. For the best experience across both themes, upload a logo for each background. If only one version is uploaded, members using the other theme will see no logo.
What happens if I choose colors with low contrast?
What happens if I choose colors with low contrast?
Disco displays a warning that your colors have a low contrast ratio. You can still save your settings and continue, but we recommend choosing colors that are accessible for all members.
Will my branded images update automatically if I change my theme or primary color?
Will my branded images update automatically if I change my theme or primary color?
No. Changing your theme or primary color does not automatically regenerate existing branded images. A notice will appear on each affected image. Regenerate them individually from each content item’s media modal.
Can I disable navigation tabs without deleting my content?
Can I disable navigation tabs without deleting my content?
Can I use my own URL instead of yourname.disco.co?
Can I use my own URL instead of yourname.disco.co?
Yes. Navigate to Admin → Appearance → Domain and connect your custom domain. Fill out the form with your domain details to complete the setup.