Overview
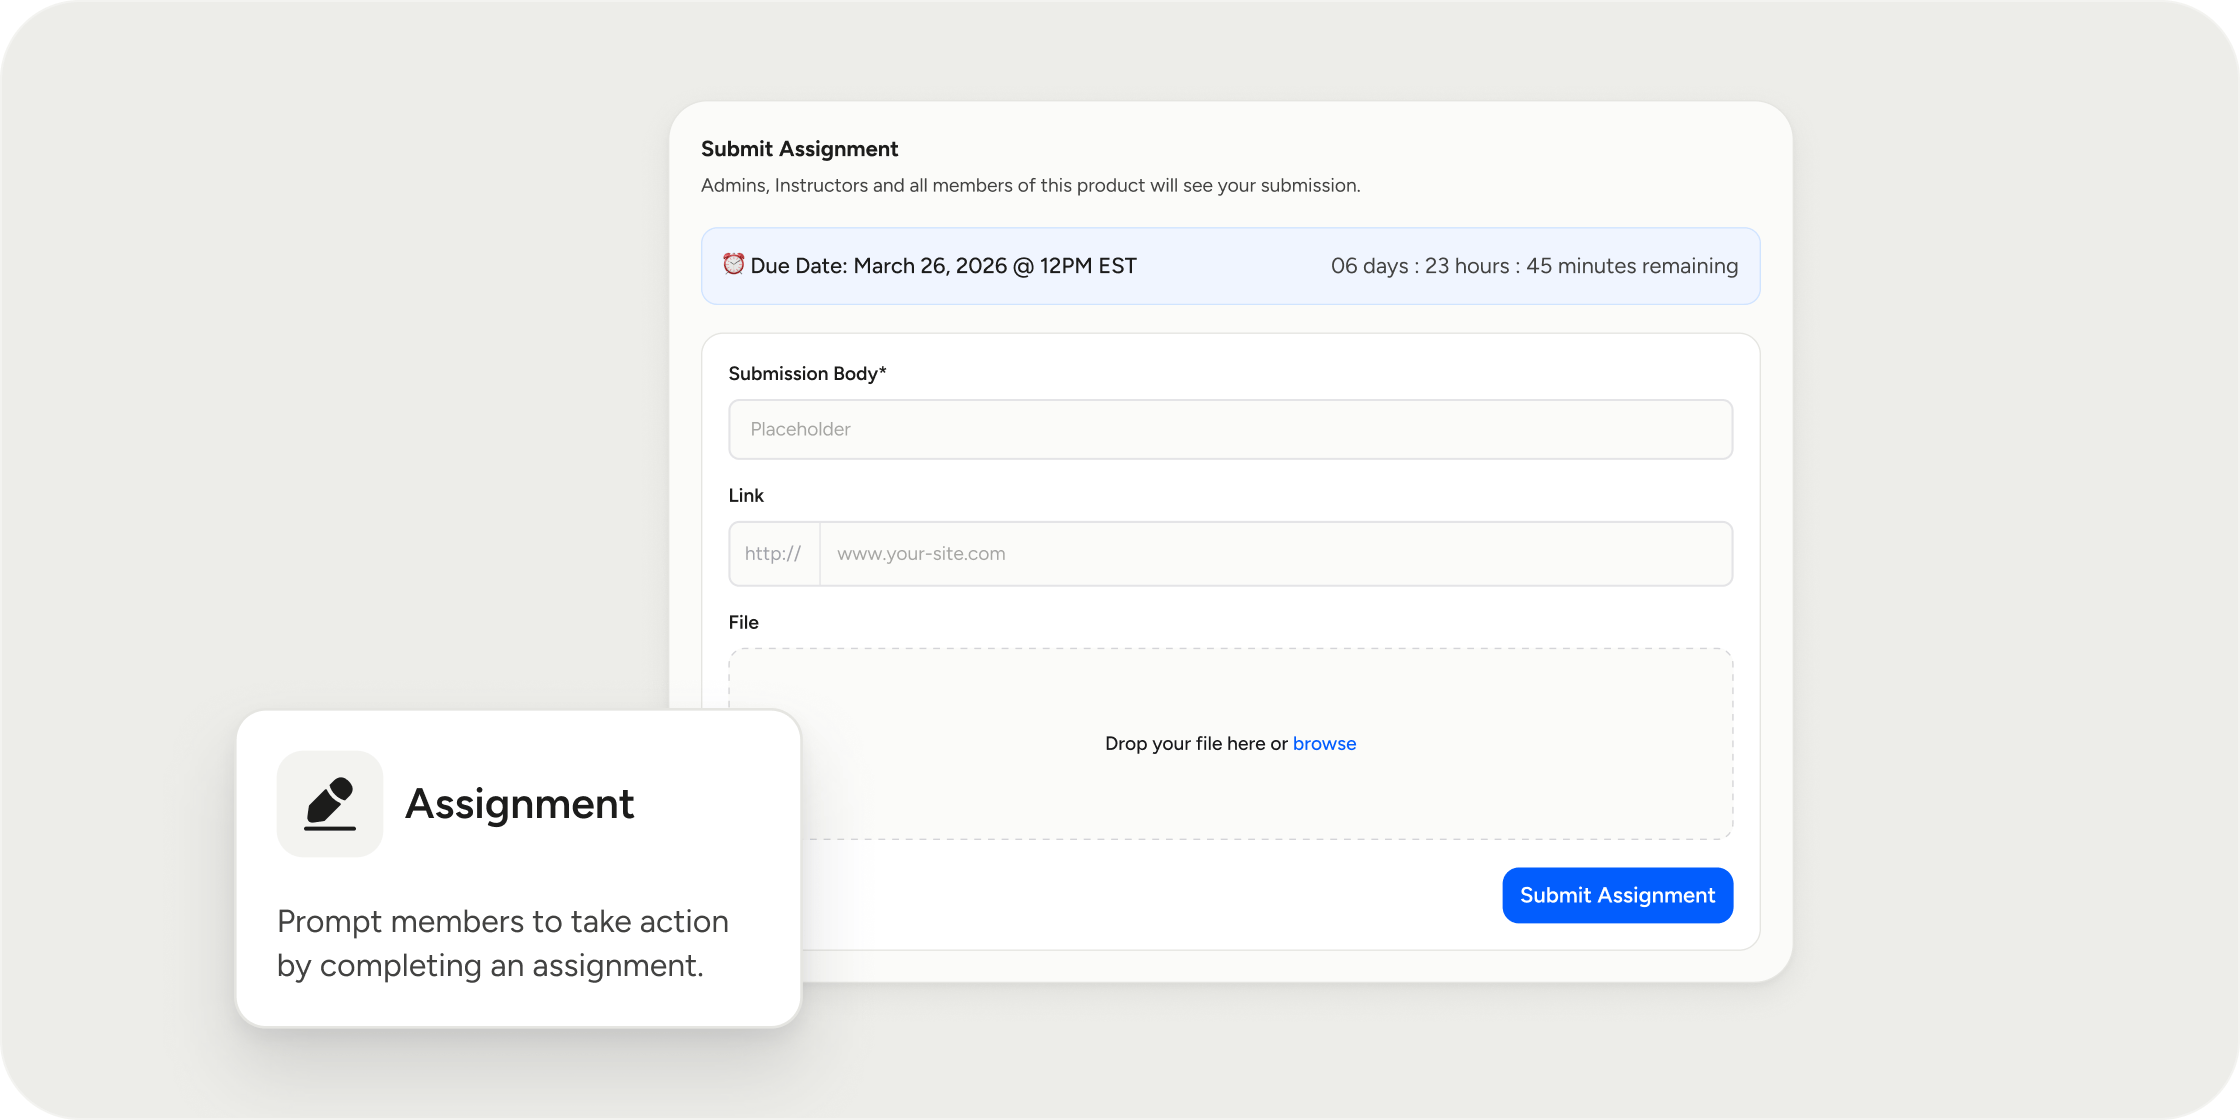
Unlike lessons, assignments prompt members to do something: upload a file, write a response, paste a link, or check a confirmation box. They are added to your curriculum inside a module and support robust configuration options, including review workflows, due dates, and submission visibility controls. Assignments are well-suited for projects, reflections, policy acknowledgments, and any task where completion should be verified.Create an Assignment
Add an assignment directly from your curriculum.- Navigate to your Program’s Curriculum page.
- Inside a module, click Add and select Assignment.
- Enter a Title for the assignment.
- Optionally, add Featured Media to the top of the assignment. Just like a lesson, this acts as the assignment’s cover and can be an image, video, audio, an embed (YouTube, Loom, Google Doc, etc.), or custom HTML/iFrame code.
- Configure the assignment from the Set Up Assignment modal. Open it using the gear (settings) icon on the submission box at the bottom of the assignment.
- Assignment Due Date: Set a due date so members can see the deadline on the assignment. If reminder emails are enabled in your Program’s settings, members automatically receive a reminder email 24 hours before the due date.
- Completion Method: Choose how members complete the assignment.
- Members are required to submit their work, such as text, link, or file. You can enable or disable each format independently and mark each as optional or mandatory.
- Or members can click a button to mark the assignment as completed.
- Submission Visibility: Choose who can see members’ submissions.
- Click Done.
- Use the rich text editor to write the assignment instructions, context, or expectations for members.
- Optionally, add attachments to provide reference materials.
- Click Save.
Assignment Content Settings
Assignments have more configuration options than other content types. Access other content settings from the Admin button > Settings.- Comments: Toggle on or off to control whether members can discuss the assignment with each other.
- Prerequisites: Use prerequisites to require members to complete specific content before they can access this assignment. Prerequisites are set at the instance level, meaning the same assignment can have different prerequisites across different Programs.
- Confirmation Checkboxes: Require members to check a box before marking the assignment complete. This is useful for acknowledging a policy or confirming they completed an offline task. This works the same way as the confirmation checkbox on lessons.
- Require Pass to Progress: This toggle controls whether submissions are auto-completed or held for review.
- Off: When a member submits, the assignment is automatically marked complete. No review is needed.
- On: Submissions enter a pending review state. An instructor must manually pass or fail each submission before it counts as complete.
- Content Labels: Change how the assignment is labeled in the UI (for example, “Homework” or “Project”). This is a cosmetic setting only. Changing the label does not change how the assignment behaves.
- Time Estimates: Once the assignment is saved, time estimation will be available. The initial estimate is AI-generated based on the assignment content. You can edit it manually. If you add more content later, you can retrigger the AI estimate. If the assignment does not have enough content, the AI option will be unavailable.
Review Submissions
When Required to Progress is enabled, submissions enter a pending review state until an instructor acts on them.- Open the assignment and select the Admin button > Submissions.
- Click Submissions Report.
- Click into a submission to review it.
- Select Pass or Fail. The submission status updates immediately and members are unblocked to progress if passed.
View Analytics
After an assignment is created, an Analytics tab becomes available.- Open the assignment and select the Admin button > Analytics.
- Review total views and unique viewers for the assignment.
Share an Assignment by Email
Send the assignment directly to all members of the Program.- Open the assignment and click the Admin button > Select Share by Email
- Customize the email subject and email body.
- Click Share. The assignment is sent to the members enrolled in that program.
FAQ
Can the same assignment have different prerequisites in different Programs?
Can the same assignment have different prerequisites in different Programs?
Yes. Prerequisites are set at the instance level, so you can configure different prerequisite content for the same assignment depending on which Program it appears in.
What happens if I change the content label to "Quiz"?
What happens if I change the content label to "Quiz"?
The label change is cosmetic only. The assignment still behaves as an assignment and does not gain any quiz-specific functionality like scoring or question types.
Can members see each other's submissions if I set visibility to Managers only?
Can members see each other's submissions if I set visibility to Managers only?
No. With Managers only selected, only managers and instructors can see submissions. Members can still view their own submission but not anyone else’s.
What happens if a member submits and “Required Pass to Progress” is on, but no one reviews it?
What happens if a member submits and “Required Pass to Progress” is on, but no one reviews it?
The submission stays in a pending review state. The assignment does not count as complete until an instructor passes or fails it. Members cannot complete this assignment until a review is completed.
Can I retrigger the AI time estimate after editing an assignment?
Can I retrigger the AI time estimate after editing an assignment?
Yes. If you update the assignment content and want a fresh estimate, you can retrigger the AI-generated time estimate from the assignment editor. The option is only available when there is enough content for the AI to evaluate.