> ## Documentation Index
> Fetch the complete documentation index at: https://docs.disco.co/llms.txt
> Use this file to discover all available pages before exploring further.
# Manage Members
Member Management is the admin hub that gives you full control over who is in your Academy, how they're organized, and what access they have.
 ## Overview
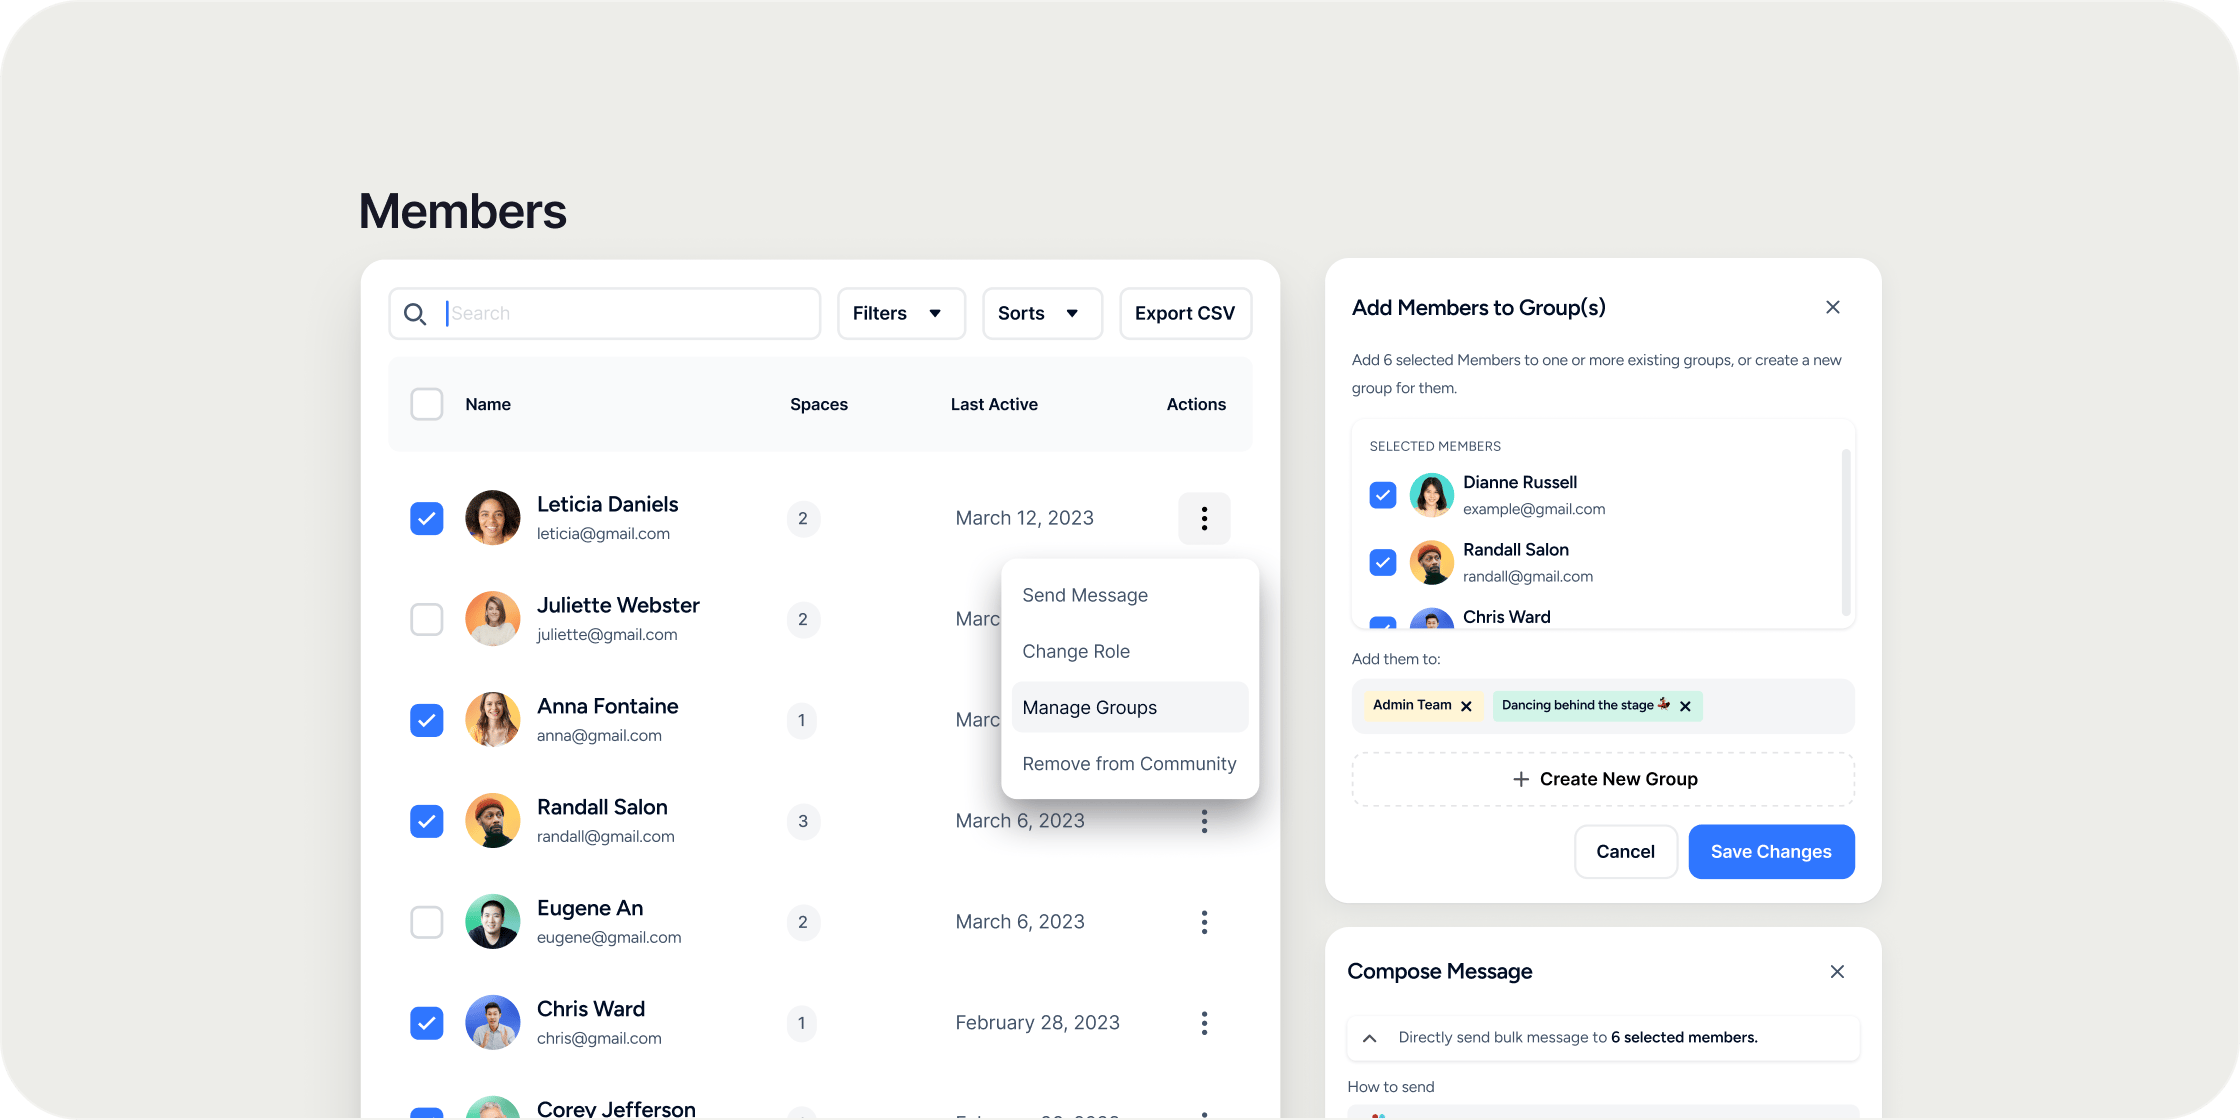
Member Management lives in your admin panel and covers everything related to members across their entire lifecycle, from invite to deactivation. You can view and filter your full member roster, take bulk or individual actions, manage invites and applications, organize members into groups, configure profile fields, set up onboarding, and define roles. All member data is retained even after deactivation, so your reporting stays intact.
## Navigate to Member Management
All member management tools are accessible from a single location in the admin panel.
1. Click **Admin** in the left navigation.
2. Select **Members** from the sidebar.
3. Use the sub-tabs to navigate between **Members**, **Invites**, **Applications**, **Groups**, **Profile Fields**, **Onboarding**, **Guests**, and **Roles**.
## View and Filter Your Member Roster
The **Members** tab displays a table of every member in your Academy. Columns include role, program roles, membership plan, groups, programs, last active date, join date, email, time zone, and any custom profile field responses.
To filter the table:
1. Click the **Filters** dropdown.
2. Select from the available filter options:
* **Role:** filter by Owner, Admin, or Member
* **Programs:** search and select a program
* **Events:** filter by attended, not attended, or no response
* **Groups:** filter by system groups, custom groups, or subgroups
* **Membership Plan:** filter by plan name
* **Profile Fields:** filter by custom profile field responses
* **Status:** filter by Active or Deactivated
To sort the table, click any column header for **Name**, **Last Active**, or **Join Date** to toggle ascending or descending order.
To export the current view, click **Export CSV**. The export reflects whatever filters you have currently applied.
## Message All Members
Use the **Message All** button to send a bulk email to every member in your Academy.
1. Click **Message All** in the top right of the Members page.
2. Add a Subject and write your message body.
3. Use the user.first\_name and user.last\_name macros to personalize the email.
4. Click **Send**.
## Invite Members to Your Academy
Use the **Invite** button to bring new members into your Academy individually, by email, or in bulk.
1. Click **Invite** in the top right of the Members page.
2. Choose your invite method:
* **Invite by link:** copy and share a join link
* **Invite by email:** enter an email address and select the role: Member, Admin, or Owner
* **Bulk import:** download the CSV template, fill it in, and upload
3. Send the invite.
## Take Action on a Member
Selecting a member from the table surfaces a toast with quick-action options.
1. Check the box next to a member's name in the table.
2. A toast appears at the bottom of the screen. Choose from:
* **Message:** send a direct email to that member
* **Add to Group:** add the member to a custom group
* **Add to Program or Pathway:** assign the member directly to a program or pathway
3. For additional options, open the **More** dropdown in the toast:
* **Make Owner:** promote the member to Academy Owner
* **Deactivate Member:** restrict access while retaining all data
* **Remove from Academy:** permanently remove the member
## Manage Invites
The **Invites** tab shows a table of everyone who has been invited to your Academy, with details on invite status, role, source, send date, and acceptance date.
To filter invites, use the available filters:
* **Status:** Invited or Accepted
* **Role:** Admin or Member
* **Program:** All, no programs, or a specific program name
* **Source:** Email or Link
To take action on an invite, click the options menu to the right of any row and select **Resend Invite** or **Delete Invite**.
## Review Applications
The **Applications** tab shows all applications submitted to programs in your Academy that require an application to join.
The table includes the member name, email, program name, application date, and status. Statuses are: **Pending**, **Accepted**, **Rejected**, or **Payment Failed**.
To filter applications:
1. Use the **Status** filter to narrow by Pending, Accepted, Rejected, or Payment Failed.
2. Use the **Programs** filter to view applications for a specific program.
To contact an applicant, check their row and select **Compose Email** from the toast.
**Note on Payment Failed:** This status appears when an application is accepted but the subsequent payment processing fails. The member receives an acceptance email and then Disco attempts to process payment; if that fails, the application is marked Payment Failed.
## Organize Members with Groups
The **Groups** tab lets you segment your Academy members using system-generated and custom groups. The table shows group name, type (System or Custom), visibility, member count, and creation date.
### Create a Subgroup
1. Click the dropdown menu to the right of any group row.
2. Select **Create Subgroup**.
3. Enter a Subgroup Name and select a Badge Color.
4. Set visibility. Subgroups inherit the parent group's visibility by default.
5. Add members by role using the member table within the subgroup.
### Manage Members Within a Group
1. Click into any group to open the group detail view.
2. View the full member list and filter by role.
3. To assign a group lead or remove a member, click the dropdown to the right of their row and select the appropriate action.
## Configure Profile Fields
The **Profile Fields** tab controls what information is collected from members during signup and displayed on member profiles. Disco includes a set of standard fields and supports custom fields.
### Standard Profile Fields
Standard fields and their default visibility rules:
* Email Address: always visible to Admins only; cannot be disabled or shown to other members
* Public Groups: always visible to everyone; cannot be toggled off
* Bio: visible to Admins only or everyone; can be toggled on or off
* Local Time Zone: visible to Admins only or everyone; cannot be toggled off
### Create a Custom Profile Field
1. Click **Add Field** on the Profile Fields page.
2. Select a field type:
* **Single Select:** member chooses one option from a list
* **Multi-Select:** member can choose multiple options from a list
* **Written Answer:** member provides a plain text response
* **Link:** member provides a URL (e.g., a portfolio website)
3. Name the field and add any required options.
4. Set visibility to **Everyone** or **Admins Only**.
5. Toggle **Capturing** on or off to control whether the field appears during profile setup.
To manage an existing custom field, use the options menu on the right of that field row to **Edit**, **Duplicate**, or **Delete**.
## Set Up Member Onboarding
The **Onboarding** tab lets you build a step-by-step welcome flow for new members. Onboarding is off by default.
1. Toggle **Onboarding** on at the top of the page.
2. Configure each of the 8 steps as needed:
| **Step** | **What to configure** |
| :---------------------- | :------------------------------------------------------ |
| Welcome | Description, cover image or video, subheader, step name |
| Community Guidelines | Subheader, step name, guidelines text |
| Complete Your Profile | Shows standard profile fields being captured |
| Tell Us About Yourself | Shows custom profile fields being captured |
| Connect Slack | Appears if Slack integration is enabled |
| Connect Your Calendar | Appears if calendar integration is enabled |
| Download the Mobile App | Displays QR codes for iOS and Android |
| Completion | Confirmation screen shown at the end |
3. Click **Preview Onboarding** in the top right to walk through the flow as a member would experience it.
We recommend enabling onboarding for any Academy with more than one program or a strong community component. Completing the profile fields and connecting integrations during onboarding dramatically improves member engagement from day one.
## Manage Guests
The **Guests** tab lists members who joined your Academy as event guests rather than full members. From this tab, you can send invites to guests to bring them into the Academy as full members.
## Manage Roles
The **Roles** tab shows all community and program-level roles in your Academy. Community roles are Owner, Admin, and Member. Program roles are Manager and Instructor.
### View Role Permissions
1. Click any role to open the role detail drawer.
2. Review the list of access permissions assigned to that role.
### Customize a Role
1. Open the role drawer by clicking the role name.
2. Update the Role Name and add a Role Description.
3. View system groups that include all members of that role.
### Change a Member's Role
1. Open the role drawer.
2. Scroll to the member table showing all members currently assigned that role.
3. Click the dropdown to the right of a member's row.
4. Select a different role at the same level (e.g., from Admin to Owner or Member).
### Invite Members to a Role
1. Open the role drawer.
2. Click **Invite Role** in the bottom right.
3. Choose **Invite by Link**, **Invite by Email**, or **Bulk Import**, using the same options available from the main Invite modal.
## Deactivate and Activate Members
Deactivating a member restricts their access to the Academy without permanently removing them or their data.
### Deactivate a Member
1. Go to **Admin** → **Members**.
2. Check the box next to the member's name.
3. Open the **More** dropdown in the toast and select **Deactivate Member**.
A deactivated member can no longer access the Academy or any of its programs. They are removed from program and group member lists. Their historical data remains intact and visible to Admins in the Insights tab.
### Activate a Member
1. Go to **Admin** → **Members**.
2. Apply the **Status: Deactivated** filter to find the member.
3. Check the box next to the member's name.
4. Open the **More** dropdown and select **Activate Member**.
The member regains full access immediately.
Deactivation is the right choice when you need to remove a member's access but want to preserve their learning history and reporting data. For example, use it when offboarding a cohort or handling a payment dispute. Use **Remove from Academy** only when you need a permanent removal.
## FAQ
Yes. Apply filters to the Members table first. For example, filter by a specific program or group, then use the individual member toast to message selected members. The **Message All** button sends to your entire Academy, but filtering lets you identify the right subset before taking action.
All data is retained. Deactivated members no longer appear in program member lists or group rosters, but their historical activity, completions, and engagement data remain visible to Admins in the Insights tab.
Yes. Filter the Members table by **Status: Deactivated**, then click **Export CSV**. The export reflects the current filtered view.
Yes. A member can have a community-level role (Member, Admin, Owner) and separate program-level roles (Instructor, Manager) within individual programs. These are managed independently.
Deactivating restricts access while keeping all member data, history, and reporting intact. Removing a member permanently deletes their connection to the Academy. Deactivation can be reversed; removal cannot.
When using the bulk import CSV, you invite members into the Academy with a designated role. To assign them to a specific program, use the **Add to Program** action from the member toast after they have joined.
## Overview
Member Management lives in your admin panel and covers everything related to members across their entire lifecycle, from invite to deactivation. You can view and filter your full member roster, take bulk or individual actions, manage invites and applications, organize members into groups, configure profile fields, set up onboarding, and define roles. All member data is retained even after deactivation, so your reporting stays intact.
## Navigate to Member Management
All member management tools are accessible from a single location in the admin panel.
1. Click **Admin** in the left navigation.
2. Select **Members** from the sidebar.
3. Use the sub-tabs to navigate between **Members**, **Invites**, **Applications**, **Groups**, **Profile Fields**, **Onboarding**, **Guests**, and **Roles**.
## View and Filter Your Member Roster
The **Members** tab displays a table of every member in your Academy. Columns include role, program roles, membership plan, groups, programs, last active date, join date, email, time zone, and any custom profile field responses.
To filter the table:
1. Click the **Filters** dropdown.
2. Select from the available filter options:
* **Role:** filter by Owner, Admin, or Member
* **Programs:** search and select a program
* **Events:** filter by attended, not attended, or no response
* **Groups:** filter by system groups, custom groups, or subgroups
* **Membership Plan:** filter by plan name
* **Profile Fields:** filter by custom profile field responses
* **Status:** filter by Active or Deactivated
To sort the table, click any column header for **Name**, **Last Active**, or **Join Date** to toggle ascending or descending order.
To export the current view, click **Export CSV**. The export reflects whatever filters you have currently applied.
## Message All Members
Use the **Message All** button to send a bulk email to every member in your Academy.
1. Click **Message All** in the top right of the Members page.
2. Add a Subject and write your message body.
3. Use the user.first\_name and user.last\_name macros to personalize the email.
4. Click **Send**.
## Invite Members to Your Academy
Use the **Invite** button to bring new members into your Academy individually, by email, or in bulk.
1. Click **Invite** in the top right of the Members page.
2. Choose your invite method:
* **Invite by link:** copy and share a join link
* **Invite by email:** enter an email address and select the role: Member, Admin, or Owner
* **Bulk import:** download the CSV template, fill it in, and upload
3. Send the invite.
## Take Action on a Member
Selecting a member from the table surfaces a toast with quick-action options.
1. Check the box next to a member's name in the table.
2. A toast appears at the bottom of the screen. Choose from:
* **Message:** send a direct email to that member
* **Add to Group:** add the member to a custom group
* **Add to Program or Pathway:** assign the member directly to a program or pathway
3. For additional options, open the **More** dropdown in the toast:
* **Make Owner:** promote the member to Academy Owner
* **Deactivate Member:** restrict access while retaining all data
* **Remove from Academy:** permanently remove the member
## Manage Invites
The **Invites** tab shows a table of everyone who has been invited to your Academy, with details on invite status, role, source, send date, and acceptance date.
To filter invites, use the available filters:
* **Status:** Invited or Accepted
* **Role:** Admin or Member
* **Program:** All, no programs, or a specific program name
* **Source:** Email or Link
To take action on an invite, click the options menu to the right of any row and select **Resend Invite** or **Delete Invite**.
## Review Applications
The **Applications** tab shows all applications submitted to programs in your Academy that require an application to join.
The table includes the member name, email, program name, application date, and status. Statuses are: **Pending**, **Accepted**, **Rejected**, or **Payment Failed**.
To filter applications:
1. Use the **Status** filter to narrow by Pending, Accepted, Rejected, or Payment Failed.
2. Use the **Programs** filter to view applications for a specific program.
To contact an applicant, check their row and select **Compose Email** from the toast.
**Note on Payment Failed:** This status appears when an application is accepted but the subsequent payment processing fails. The member receives an acceptance email and then Disco attempts to process payment; if that fails, the application is marked Payment Failed.
## Organize Members with Groups
The **Groups** tab lets you segment your Academy members using system-generated and custom groups. The table shows group name, type (System or Custom), visibility, member count, and creation date.
### Create a Subgroup
1. Click the dropdown menu to the right of any group row.
2. Select **Create Subgroup**.
3. Enter a Subgroup Name and select a Badge Color.
4. Set visibility. Subgroups inherit the parent group's visibility by default.
5. Add members by role using the member table within the subgroup.
### Manage Members Within a Group
1. Click into any group to open the group detail view.
2. View the full member list and filter by role.
3. To assign a group lead or remove a member, click the dropdown to the right of their row and select the appropriate action.
## Configure Profile Fields
The **Profile Fields** tab controls what information is collected from members during signup and displayed on member profiles. Disco includes a set of standard fields and supports custom fields.
### Standard Profile Fields
Standard fields and their default visibility rules:
* Email Address: always visible to Admins only; cannot be disabled or shown to other members
* Public Groups: always visible to everyone; cannot be toggled off
* Bio: visible to Admins only or everyone; can be toggled on or off
* Local Time Zone: visible to Admins only or everyone; cannot be toggled off
### Create a Custom Profile Field
1. Click **Add Field** on the Profile Fields page.
2. Select a field type:
* **Single Select:** member chooses one option from a list
* **Multi-Select:** member can choose multiple options from a list
* **Written Answer:** member provides a plain text response
* **Link:** member provides a URL (e.g., a portfolio website)
3. Name the field and add any required options.
4. Set visibility to **Everyone** or **Admins Only**.
5. Toggle **Capturing** on or off to control whether the field appears during profile setup.
To manage an existing custom field, use the options menu on the right of that field row to **Edit**, **Duplicate**, or **Delete**.
## Set Up Member Onboarding
The **Onboarding** tab lets you build a step-by-step welcome flow for new members. Onboarding is off by default.
1. Toggle **Onboarding** on at the top of the page.
2. Configure each of the 8 steps as needed:
| **Step** | **What to configure** |
| :---------------------- | :------------------------------------------------------ |
| Welcome | Description, cover image or video, subheader, step name |
| Community Guidelines | Subheader, step name, guidelines text |
| Complete Your Profile | Shows standard profile fields being captured |
| Tell Us About Yourself | Shows custom profile fields being captured |
| Connect Slack | Appears if Slack integration is enabled |
| Connect Your Calendar | Appears if calendar integration is enabled |
| Download the Mobile App | Displays QR codes for iOS and Android |
| Completion | Confirmation screen shown at the end |
3. Click **Preview Onboarding** in the top right to walk through the flow as a member would experience it.
We recommend enabling onboarding for any Academy with more than one program or a strong community component. Completing the profile fields and connecting integrations during onboarding dramatically improves member engagement from day one.
## Manage Guests
The **Guests** tab lists members who joined your Academy as event guests rather than full members. From this tab, you can send invites to guests to bring them into the Academy as full members.
## Manage Roles
The **Roles** tab shows all community and program-level roles in your Academy. Community roles are Owner, Admin, and Member. Program roles are Manager and Instructor.
### View Role Permissions
1. Click any role to open the role detail drawer.
2. Review the list of access permissions assigned to that role.
### Customize a Role
1. Open the role drawer by clicking the role name.
2. Update the Role Name and add a Role Description.
3. View system groups that include all members of that role.
### Change a Member's Role
1. Open the role drawer.
2. Scroll to the member table showing all members currently assigned that role.
3. Click the dropdown to the right of a member's row.
4. Select a different role at the same level (e.g., from Admin to Owner or Member).
### Invite Members to a Role
1. Open the role drawer.
2. Click **Invite Role** in the bottom right.
3. Choose **Invite by Link**, **Invite by Email**, or **Bulk Import**, using the same options available from the main Invite modal.
## Deactivate and Activate Members
Deactivating a member restricts their access to the Academy without permanently removing them or their data.
### Deactivate a Member
1. Go to **Admin** → **Members**.
2. Check the box next to the member's name.
3. Open the **More** dropdown in the toast and select **Deactivate Member**.
A deactivated member can no longer access the Academy or any of its programs. They are removed from program and group member lists. Their historical data remains intact and visible to Admins in the Insights tab.
### Activate a Member
1. Go to **Admin** → **Members**.
2. Apply the **Status: Deactivated** filter to find the member.
3. Check the box next to the member's name.
4. Open the **More** dropdown and select **Activate Member**.
The member regains full access immediately.
Deactivation is the right choice when you need to remove a member's access but want to preserve their learning history and reporting data. For example, use it when offboarding a cohort or handling a payment dispute. Use **Remove from Academy** only when you need a permanent removal.
## FAQ
Yes. Apply filters to the Members table first. For example, filter by a specific program or group, then use the individual member toast to message selected members. The **Message All** button sends to your entire Academy, but filtering lets you identify the right subset before taking action.
All data is retained. Deactivated members no longer appear in program member lists or group rosters, but their historical activity, completions, and engagement data remain visible to Admins in the Insights tab.
Yes. Filter the Members table by **Status: Deactivated**, then click **Export CSV**. The export reflects the current filtered view.
Yes. A member can have a community-level role (Member, Admin, Owner) and separate program-level roles (Instructor, Manager) within individual programs. These are managed independently.
Deactivating restricts access while keeping all member data, history, and reporting intact. Removing a member permanently deletes their connection to the Academy. Deactivation can be reversed; removal cannot.
When using the bulk import CSV, you invite members into the Academy with a designated role. To assign them to a specific program, use the **Add to Program** action from the member toast after they have joined.