> ## Documentation Index
> Fetch the complete documentation index at: https://docs.disco.co/llms.txt
> Use this file to discover all available pages before exploring further.
# Groups & Subgroups
Groups are a flexible way to segment and organize Members in your Academy, enabling targeted access, automated workflows, bulk communications, and reporting.
 ## Overview
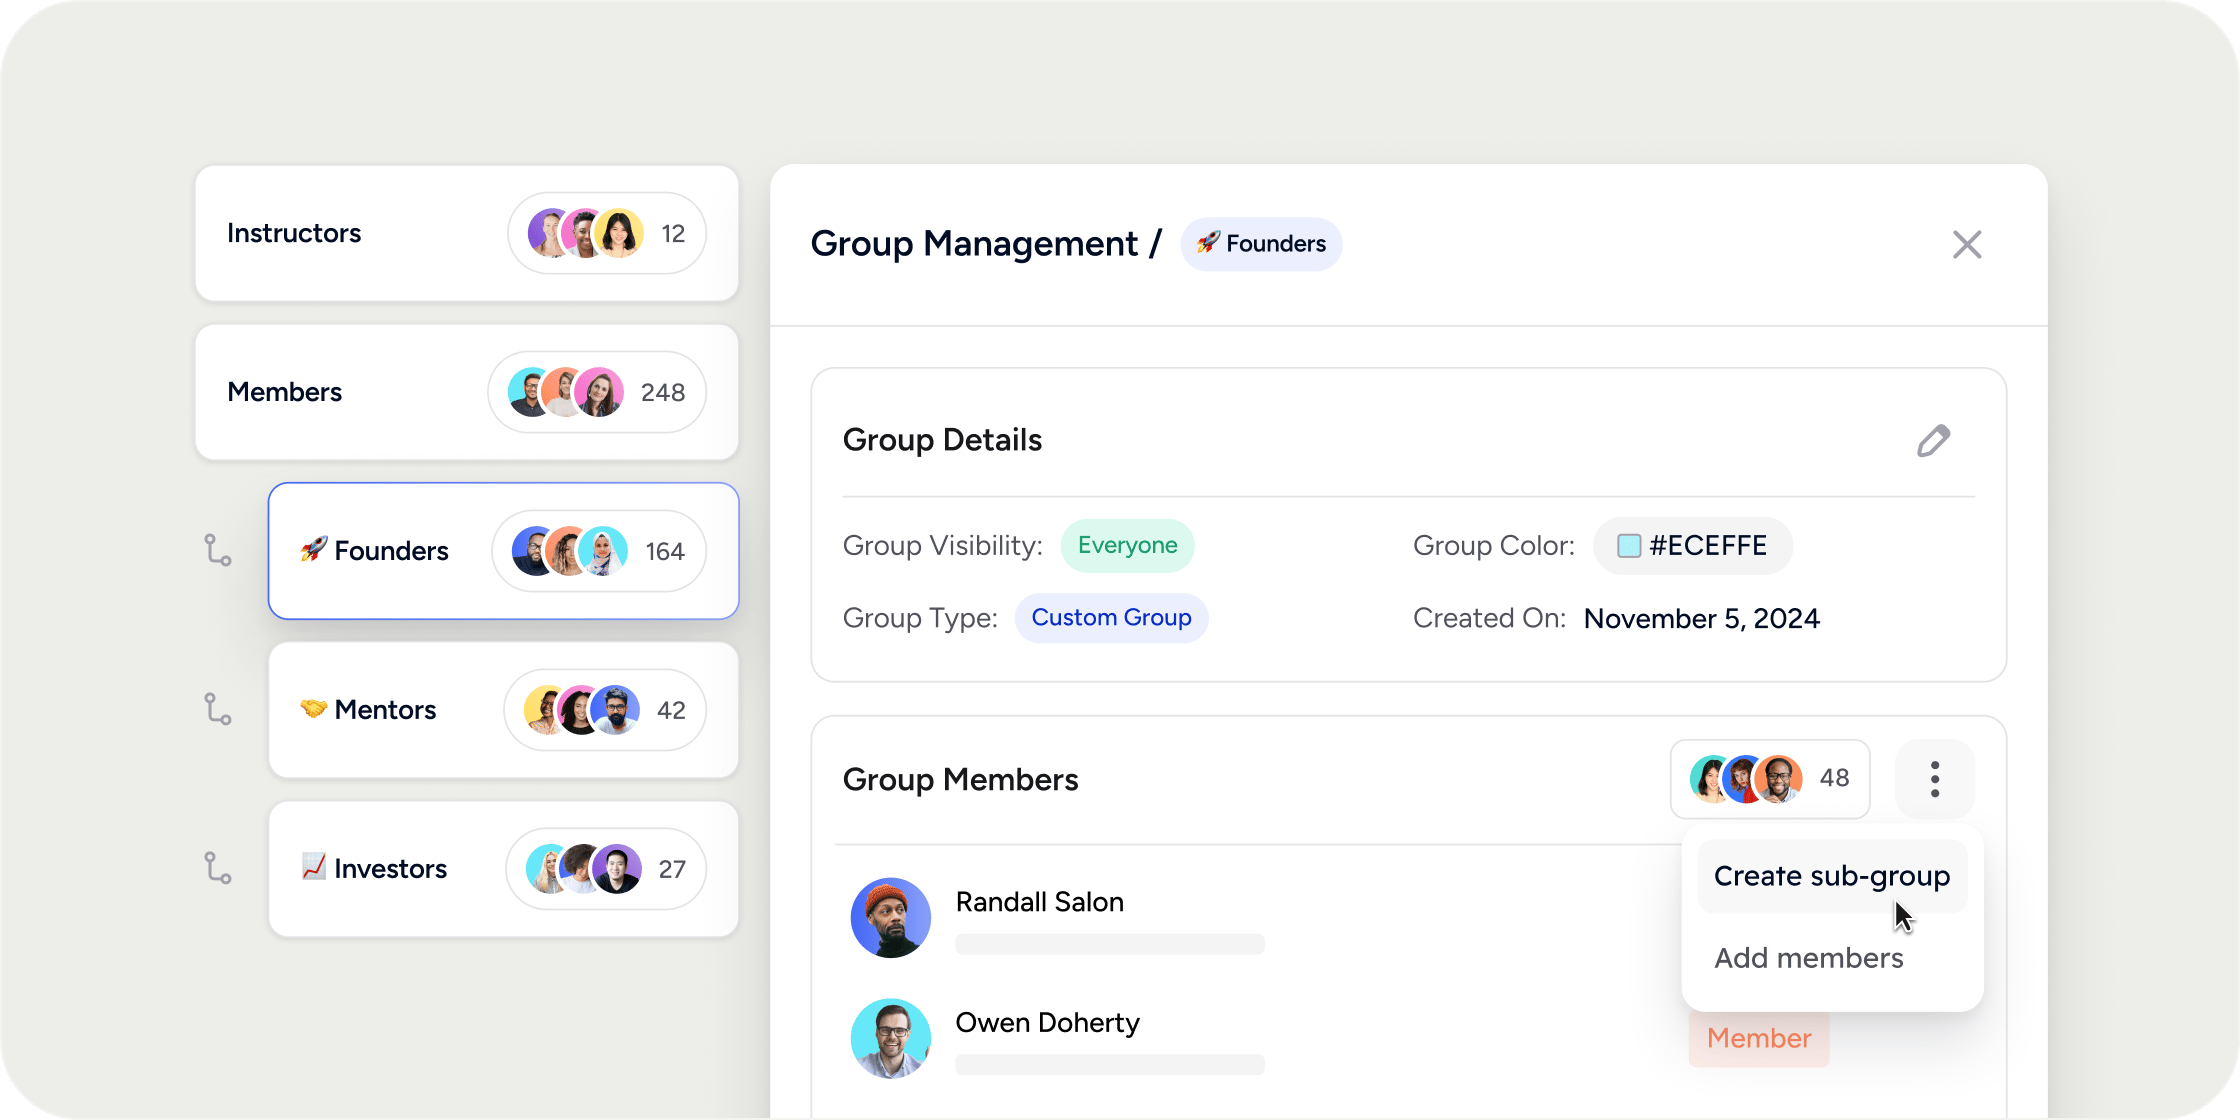
Every Disco Academy has groups from the moment it launches. Some are created and maintained automatically by the platform (System Groups); others you create and manage yourself (Custom Groups). Groups control which apps Members can access, how Members appear in reports, and which assignment submissions Members can see. They are one of the most versatile building blocks in Disco.
## Group Types
There are two main categories of groups: System Groups and Custom Groups.
**System Groups** are created and maintained automatically by Disco. The platform generates them for your entire Academy (the "Everyone" group), for each admin role (**Academy Admins**, **Academy Owners**), for each membership plan, and for each Program you create. Each Program automatically receives three system groups: one for all registered Members regardless of role, one for Managers, and one for Instructors.
You cannot create, delete, or edit System Groups, and you cannot manually add or remove Members from them. Disco manages membership automatically based on who holds each role or is registered for each Program.
**Custom Groups** are groups you create and manage. Use them to segment Members by cohort, geographic region, interest, or any other criteria relevant to your Academy. You choose who belongs, set visibility, assign Group Leads, and create subgroups.
## Navigate to the Groups Page
The primary interface for managing all groups lives in the Admin space.
1. Click **Admin** in the left navigation.
2. Select the **Members** tab.
3. Click the **Groups** tab.
From here, you can search groups by name, sort by name or creation date, and filter by group type (System or Custom).
## Create a Custom Group
1. On the Groups page, click **+ Group** in the top right.
2. Optionally upload an image for the group. The image appears in the Group Directory app but not in most other areas of the platform.
3. Enter a name for the group.
4. Optionally select a color tag.
5. Optionally add a description. Like the image, this surfaces primarily in the Group Directory app.
6. Choose a **Visibility** setting (see the section below before proceeding).
7. Add Members using the member table.
8. In the member table dropdown, optionally designate a Member as a **Group Lead**.
9. Click **Create Group**.
## Bulk Create Groups with CSV
Instead of creating groups one at a time, you can upload a single CSV to create Academy-level or Program-level groups in bulk. Each row in the CSV represents one group or subgroup. You can set the name, visibility, color, description, and parent group for each entry. Once the import is complete, you will receive an email notification confirming which groups were created and which, if any, failed.
### Prepare your CSV
Your CSV can include the following columns for each group:
* **Name** (required): The display name of the group
* **Level**: `academy` or `program`, depending on where the group lives
* **Visibility**: Controls who can see the group
* **Color**: The group's color label
* **Description**: A short description of the group's purpose
* **Parent group**: The name of the parent group, if this row is a subgroup
If you are creating a subgroup, its parent group must already exist in the Academy before the import runs, or it must appear in an earlier row in the CSV. Groups are created top-down, so a parent row must always come before any of its child rows.
### Import Group CSV
1. Go to the **Groups** page in your Academy admin panel.
2. Click the dropdown arrow next to **+ Group** in the top right corner.
3. Select **Import CSV**.
4. Upload your CSV file.
5. Click **Import Groups**.
Once the import runs, you will receive an email confirmation listing which groups were successfully created and which rows failed, along with the reason.
## Set Group Visibility
When creating a Custom Group, you must choose one of two visibility settings. **This setting cannot be changed after the group is created**, so choose carefully before saving.
* **Everyone** means Members added to this group can see their group membership throughout the Academy, including on their own profile. This setting is required if you want to feature the group in a Group Directory app or target it for private Events.
* **Admin Only** means Members will not know they have been added to this group. The group is invisible to them everywhere in the Academy, including their profile. Admin Only groups work in automations and control access to most apps. However, there are two hard limitations:
* Admin Only groups cannot be featured in a Group Directory app.
* Admin Only groups cannot be used to target private Events.
When in doubt, choose "Everyone." Admin Only groups are purpose-built for sensitive internal segmentation where Members must remain unaware of the grouping. If you might ever need to feature the group in a directory or use it for event access, "Everyone" is the safer choice.
## Edit or Delete a Custom Group
To edit a group, open the row dropdown on the Groups page and select **Edit**. You can update the name, colour, image, description, and Members. You cannot change the visibility setting.
To delete a group, open the row dropdown and select **Remove Group**. Deleting a group also removes any subgroups it contains.
You can not edit a System Group. System groups are maintained by the platform and are added and removed as the system objects (Memberships, Learning Pathways, and Programs) are managed.
## Assign and Manage Group Leads
Any Member with a standard community Member role can be designated as a Group Lead for one or more Custom Groups. Group Leads are not Admins, but they gain access to specific reporting capabilities scoped to the groups they lead.
A Group Lead can:
* View the **Members** report showing all Members across every group they lead, including profile fields, Program roles, and completion data.
* Select Members and send bulk email messages or Slack DMs (if Slack is connected to the Academy).
* Access the **Insights** tab and run a group-level report showing each Member's Program enrollment and completion progress.
* Send a bulk message to everyone in the group directly from the Insights report.
To assign a Group Lead, open the group detail drawer, go to the **Members** tab, and select **Assign as Group Lead** from the dropdown next to the Member's name. To remove leadership status, select **Assign as Group Member** from the same dropdown.
## Create Subgroups
Subgroups let you organize Members within a group into smaller segments. Subgroups are one level deep: you can create a subgroup within a Custom Group, but subgroups cannot contain their own subgroups.
All subgroups inherit the visibility setting of their parent group. Only Members already in the parent group can be added to a subgroup.
### Create a subgroup from the group detail drawer
1. On the Groups page, click a group name to open its detail drawer.
2. Click the **Subgroups** tab.
3. Click **Create Subgroup**.
4. Enter a name, select a color, optionally add a description, and add Members.
5. Click **Create**.
### Create a subgroup from unassigned Members
Members in a parent group who have not yet been added to any subgroup appear in an **Unassigned Members** row in the subgroup table.
1. Hover over the **Unassigned Members** row and open its dropdown.
2. Click **Assign to New Subgroup**.
3. The subgroup creation modal pre-populates with all unassigned Members. Adjust membership as needed and complete the form.
This is a fast way to create a final subgroup from everyone not yet organized.
## Create and Manage Program Subgroups
Program Subgroups (referred to as Product Groups in some areas of the platform) are subgroups created within a Program's system group. They let you organize Program Members into smaller cohorts or sections and use those groupings for targeted access, reporting, and assignment visibility.
Program Subgroups function like other subgroups. You can use them in automations, filter the Members page by them, and control app access with them. They cannot have their own subgroups. Only Members already registered for the Program can be added.
### Create a Program Subgroup as an Academy Admin
1. On the Groups page, find the system group for the Program (for example, "Web Dev 101 - All").
2. Click the expansion indicator to see existing subgroups.
3. Open the system group detail drawer and click the **Subgroups** tab.
4. Click **Create Subgroup** and complete the form.
### Create a Program Subgroup as a Program Manager
Program Managers who do not have an Academy Admin role can only manage Program Subgroups from within the Program itself. They do not have access to the Admin Groups page.
1. Open the Program and click **Settings** to open the Program Settings drawer.
2. Click the **Subgroups** tab.
3. Click **Create Subgroup** and complete the form.
4. To edit or remove a subgroup, use the overflow option next to the subgroup name.
## Control Assignment Submission Visibility with Subgroups
Program Subgroups have a specific and powerful use in assignments: controlling which Members can see each other's submissions.
In the assignment settings, set **Submission Visibility** to **Subgroup Members**. With this setting active:
* A Member can only see submissions from others in the same subgroup.
* Program Managers and Instructors are subject to the same restriction unless they hold a community Owner or Admin role. Without that role, they must be a member of the same subgroup as the submitter to see that submission.
* Community Owners and Admins can always see all submissions, regardless of subgroup membership.
* If a Member belongs to multiple subgroups, they can see submissions from all of those subgroups.
A reliable setup for bootcamps and cohort programs is to add each Instructor to every subgroup within the Program. This ensures Instructors can review all submissions while Members only see submissions from their own cohort.
## Use Groups Across the Platform
Groups connect to many other features in Disco.
* **Automations:** Filter automation conditions by group membership, or trigger automations when a Member is added to or removed from a group. For example, send a welcome email the moment a Member joins a specific group.
* **App access:** Restrict any community-level app, and most Program-level apps, to a specific group. Only Members in that group will see and access the app. When a Member is removed from the group, they automatically lose access. The curriculum app does not support group-level access restrictions.
* **Group Directory app:** Feature Custom Groups with "Everyone" visibility in a Group Directory app on your Academy home page. Admin Only groups do not appear in a Group Directory.
* **Member filtering:** The Members page, the Analytics section, and many other areas let you filter by group membership. This is the fastest way to locate a specific segment of your Academy.
## FAQ
Yes. There is no limit to the number of groups or subgroups a Member can belong to.
It depends on visibility. If the group is set to "Everyone," Members can see their group membership on their own profile and throughout the Academy. If the group is set to "Admin Only," Members cannot see the group anywhere.
No. Group reports show the Member's overall activity and progress across the Academy, not activity scoped to that group alone. If a Member belongs to multiple groups, their full activity appears in the report for whichever group you are viewing.
No. Visibility cannot be changed after a group is created. If you need a different setting, delete the group and create a new one.
The CSV bulk invite supports adding Members to Program Subgroups only, not to community-level Custom Groups. There is currently no direct way to bulk-add Members to a community-level Custom Group via CSV.
No. Admin Only groups cannot be used to target private Events. If you need to restrict an Event to a specific group, use a group with "Everyone" visibility.
Not currently. Group-based access control is not available for individual curriculum modules. You can restrict access for channel and event apps within a Program, but not for specific modules in the curriculum app.
Yes, for groups with "Everyone" visibility. Groups set to "Admin Only" are never displayed on Member profiles.
## Overview
Every Disco Academy has groups from the moment it launches. Some are created and maintained automatically by the platform (System Groups); others you create and manage yourself (Custom Groups). Groups control which apps Members can access, how Members appear in reports, and which assignment submissions Members can see. They are one of the most versatile building blocks in Disco.
## Group Types
There are two main categories of groups: System Groups and Custom Groups.
**System Groups** are created and maintained automatically by Disco. The platform generates them for your entire Academy (the "Everyone" group), for each admin role (**Academy Admins**, **Academy Owners**), for each membership plan, and for each Program you create. Each Program automatically receives three system groups: one for all registered Members regardless of role, one for Managers, and one for Instructors.
You cannot create, delete, or edit System Groups, and you cannot manually add or remove Members from them. Disco manages membership automatically based on who holds each role or is registered for each Program.
**Custom Groups** are groups you create and manage. Use them to segment Members by cohort, geographic region, interest, or any other criteria relevant to your Academy. You choose who belongs, set visibility, assign Group Leads, and create subgroups.
## Navigate to the Groups Page
The primary interface for managing all groups lives in the Admin space.
1. Click **Admin** in the left navigation.
2. Select the **Members** tab.
3. Click the **Groups** tab.
From here, you can search groups by name, sort by name or creation date, and filter by group type (System or Custom).
## Create a Custom Group
1. On the Groups page, click **+ Group** in the top right.
2. Optionally upload an image for the group. The image appears in the Group Directory app but not in most other areas of the platform.
3. Enter a name for the group.
4. Optionally select a color tag.
5. Optionally add a description. Like the image, this surfaces primarily in the Group Directory app.
6. Choose a **Visibility** setting (see the section below before proceeding).
7. Add Members using the member table.
8. In the member table dropdown, optionally designate a Member as a **Group Lead**.
9. Click **Create Group**.
## Bulk Create Groups with CSV
Instead of creating groups one at a time, you can upload a single CSV to create Academy-level or Program-level groups in bulk. Each row in the CSV represents one group or subgroup. You can set the name, visibility, color, description, and parent group for each entry. Once the import is complete, you will receive an email notification confirming which groups were created and which, if any, failed.
### Prepare your CSV
Your CSV can include the following columns for each group:
* **Name** (required): The display name of the group
* **Level**: `academy` or `program`, depending on where the group lives
* **Visibility**: Controls who can see the group
* **Color**: The group's color label
* **Description**: A short description of the group's purpose
* **Parent group**: The name of the parent group, if this row is a subgroup
If you are creating a subgroup, its parent group must already exist in the Academy before the import runs, or it must appear in an earlier row in the CSV. Groups are created top-down, so a parent row must always come before any of its child rows.
### Import Group CSV
1. Go to the **Groups** page in your Academy admin panel.
2. Click the dropdown arrow next to **+ Group** in the top right corner.
3. Select **Import CSV**.
4. Upload your CSV file.
5. Click **Import Groups**.
Once the import runs, you will receive an email confirmation listing which groups were successfully created and which rows failed, along with the reason.
## Set Group Visibility
When creating a Custom Group, you must choose one of two visibility settings. **This setting cannot be changed after the group is created**, so choose carefully before saving.
* **Everyone** means Members added to this group can see their group membership throughout the Academy, including on their own profile. This setting is required if you want to feature the group in a Group Directory app or target it for private Events.
* **Admin Only** means Members will not know they have been added to this group. The group is invisible to them everywhere in the Academy, including their profile. Admin Only groups work in automations and control access to most apps. However, there are two hard limitations:
* Admin Only groups cannot be featured in a Group Directory app.
* Admin Only groups cannot be used to target private Events.
When in doubt, choose "Everyone." Admin Only groups are purpose-built for sensitive internal segmentation where Members must remain unaware of the grouping. If you might ever need to feature the group in a directory or use it for event access, "Everyone" is the safer choice.
## Edit or Delete a Custom Group
To edit a group, open the row dropdown on the Groups page and select **Edit**. You can update the name, colour, image, description, and Members. You cannot change the visibility setting.
To delete a group, open the row dropdown and select **Remove Group**. Deleting a group also removes any subgroups it contains.
You can not edit a System Group. System groups are maintained by the platform and are added and removed as the system objects (Memberships, Learning Pathways, and Programs) are managed.
## Assign and Manage Group Leads
Any Member with a standard community Member role can be designated as a Group Lead for one or more Custom Groups. Group Leads are not Admins, but they gain access to specific reporting capabilities scoped to the groups they lead.
A Group Lead can:
* View the **Members** report showing all Members across every group they lead, including profile fields, Program roles, and completion data.
* Select Members and send bulk email messages or Slack DMs (if Slack is connected to the Academy).
* Access the **Insights** tab and run a group-level report showing each Member's Program enrollment and completion progress.
* Send a bulk message to everyone in the group directly from the Insights report.
To assign a Group Lead, open the group detail drawer, go to the **Members** tab, and select **Assign as Group Lead** from the dropdown next to the Member's name. To remove leadership status, select **Assign as Group Member** from the same dropdown.
## Create Subgroups
Subgroups let you organize Members within a group into smaller segments. Subgroups are one level deep: you can create a subgroup within a Custom Group, but subgroups cannot contain their own subgroups.
All subgroups inherit the visibility setting of their parent group. Only Members already in the parent group can be added to a subgroup.
### Create a subgroup from the group detail drawer
1. On the Groups page, click a group name to open its detail drawer.
2. Click the **Subgroups** tab.
3. Click **Create Subgroup**.
4. Enter a name, select a color, optionally add a description, and add Members.
5. Click **Create**.
### Create a subgroup from unassigned Members
Members in a parent group who have not yet been added to any subgroup appear in an **Unassigned Members** row in the subgroup table.
1. Hover over the **Unassigned Members** row and open its dropdown.
2. Click **Assign to New Subgroup**.
3. The subgroup creation modal pre-populates with all unassigned Members. Adjust membership as needed and complete the form.
This is a fast way to create a final subgroup from everyone not yet organized.
## Create and Manage Program Subgroups
Program Subgroups (referred to as Product Groups in some areas of the platform) are subgroups created within a Program's system group. They let you organize Program Members into smaller cohorts or sections and use those groupings for targeted access, reporting, and assignment visibility.
Program Subgroups function like other subgroups. You can use them in automations, filter the Members page by them, and control app access with them. They cannot have their own subgroups. Only Members already registered for the Program can be added.
### Create a Program Subgroup as an Academy Admin
1. On the Groups page, find the system group for the Program (for example, "Web Dev 101 - All").
2. Click the expansion indicator to see existing subgroups.
3. Open the system group detail drawer and click the **Subgroups** tab.
4. Click **Create Subgroup** and complete the form.
### Create a Program Subgroup as a Program Manager
Program Managers who do not have an Academy Admin role can only manage Program Subgroups from within the Program itself. They do not have access to the Admin Groups page.
1. Open the Program and click **Settings** to open the Program Settings drawer.
2. Click the **Subgroups** tab.
3. Click **Create Subgroup** and complete the form.
4. To edit or remove a subgroup, use the overflow option next to the subgroup name.
## Control Assignment Submission Visibility with Subgroups
Program Subgroups have a specific and powerful use in assignments: controlling which Members can see each other's submissions.
In the assignment settings, set **Submission Visibility** to **Subgroup Members**. With this setting active:
* A Member can only see submissions from others in the same subgroup.
* Program Managers and Instructors are subject to the same restriction unless they hold a community Owner or Admin role. Without that role, they must be a member of the same subgroup as the submitter to see that submission.
* Community Owners and Admins can always see all submissions, regardless of subgroup membership.
* If a Member belongs to multiple subgroups, they can see submissions from all of those subgroups.
A reliable setup for bootcamps and cohort programs is to add each Instructor to every subgroup within the Program. This ensures Instructors can review all submissions while Members only see submissions from their own cohort.
## Use Groups Across the Platform
Groups connect to many other features in Disco.
* **Automations:** Filter automation conditions by group membership, or trigger automations when a Member is added to or removed from a group. For example, send a welcome email the moment a Member joins a specific group.
* **App access:** Restrict any community-level app, and most Program-level apps, to a specific group. Only Members in that group will see and access the app. When a Member is removed from the group, they automatically lose access. The curriculum app does not support group-level access restrictions.
* **Group Directory app:** Feature Custom Groups with "Everyone" visibility in a Group Directory app on your Academy home page. Admin Only groups do not appear in a Group Directory.
* **Member filtering:** The Members page, the Analytics section, and many other areas let you filter by group membership. This is the fastest way to locate a specific segment of your Academy.
## FAQ
Yes. There is no limit to the number of groups or subgroups a Member can belong to.
It depends on visibility. If the group is set to "Everyone," Members can see their group membership on their own profile and throughout the Academy. If the group is set to "Admin Only," Members cannot see the group anywhere.
No. Group reports show the Member's overall activity and progress across the Academy, not activity scoped to that group alone. If a Member belongs to multiple groups, their full activity appears in the report for whichever group you are viewing.
No. Visibility cannot be changed after a group is created. If you need a different setting, delete the group and create a new one.
The CSV bulk invite supports adding Members to Program Subgroups only, not to community-level Custom Groups. There is currently no direct way to bulk-add Members to a community-level Custom Group via CSV.
No. Admin Only groups cannot be used to target private Events. If you need to restrict an Event to a specific group, use a group with "Everyone" visibility.
Not currently. Group-based access control is not available for individual curriculum modules. You can restrict access for channel and event apps within a Program, but not for specific modules in the curriculum app.
Yes, for groups with "Everyone" visibility. Groups set to "Admin Only" are never displayed on Member profiles.